$150+
Small Patch Repair
Small patches need thorough prep to remove failed materials and ensure adhesion. Multiple compound layers, drying time, and careful sanding deliver a clean, seamless finish.
Local Drywall repair Service
That jagged hole in the drywall, with its chipped edges and rough, uneven surface, isn’t going to fix itself. You might have searched “Drywall patch near me in Brea,” but patching it quickly won’t blend the texture or hide that broken corner. It’s not as simple as a quick paint touch-up.
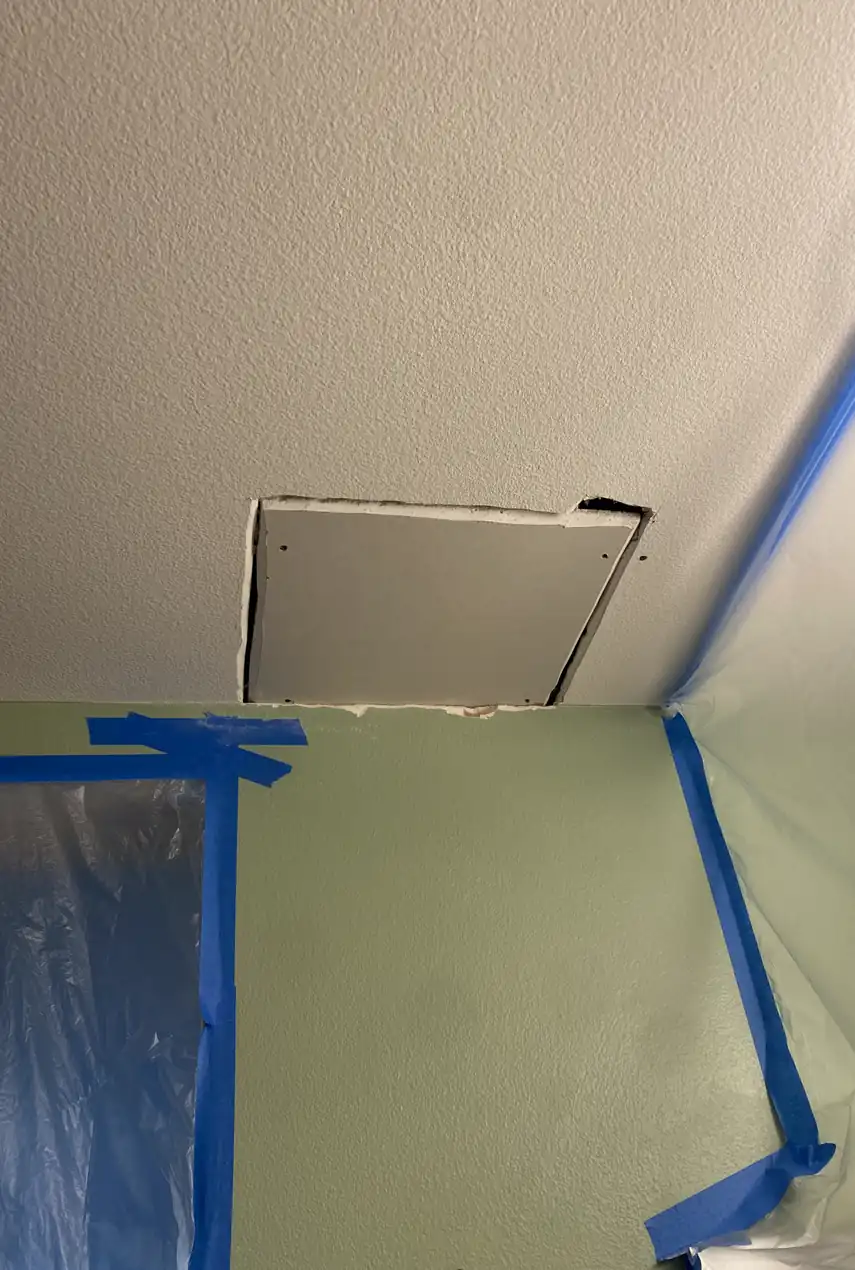
The moment I noticed that jagged hole near the corner of the living room wall, it hit me—how did this happen? Something bumped the drywall hard enough to break the edge and leave an ugly gap, textured paper torn, and the underlying gypsum exposed. The damage seemed small but gnawed at the room’s appearance, especially with sunlight casting shadows that emphasized every rough edge.
I tried fixing it myself, thinking a quick Drywall patch near me video tutorial would be enough. I stuffed the hole with some lightweight compound, then sanded it down once dry, but the patch shrunk and the seams showed up under even soft light. The texture didn’t match, and the edges stood out with faint shadows. The paint color was off too, making the repair glaringly obvious despite my effort. My frustration grew—what was supposed to be a simple fix only made it look worse.
That’s when I called in a handyman experienced with Drywall patch near me jobs. The pros arrived with dust control measures in place, carefully feathered multiple compound layers, and matched the texture to the wall’s pattern. They sanded meticulously, checked light reflection angles, and painted without a hint of mismatch. The result? No visible patch, no shadow lines—just a flawlessly smooth wall, flat from every angle. Done right the first time, with no callbacks and a clean workspace left behind.
For those searching 'Drywall patch near me' in Brea, CA, expect pricing to reflect the real effort behind fixing visible patches, failed DIY attempts, rough openings, or texture mismatches.
$150+
Small patches need thorough prep to remove failed materials and ensure adhesion. Multiple compound layers, drying time, and careful sanding deliver a clean, seamless finish.
$280+
Medium repairs involve rough openings that require rebuilding edges and extra compound passes. Multiple drying cycles and return visits ensure proper blending and texture matching.
$420+
Large or mismatched texture repairs demand detailed finish work, including several coats and precise feathering. Proper drying and repeat visits prevent quick fixes from failing again.
Top-Rated Drywall repair — 5 Stars on Yelp & Google
Looking for reliable Drywall patch near me in Brea? These eight reviews highlight real experiences with drywall repair services, sheetrock repair, drywall and paint, drywall installation, and more.
★★★★★
There was a big hole from a door handle in my hallway drywall. Tried a kit myself but it was rough and raised. The handyman came, explained the process, and the sheetrock repair looks solid now with smooth edges.
Linda M
★★★★★
My DIY drywall patch was peeling within days and had cracking seams. They came back for a second pass, kept the dust controlled, and now the wall’s even in texture with no paint mismatch.
Chris D
★★★★★
Paint didn’t match after an old patch faded badly. The repair included sanding and matching paint; he showed up on time, didn’t rush drying, and the patch no longer draws attention even in bright light.
Sara
★★★★★
The soft drywall under my living room dent was tricky—I thought a simple patch was enough but it needed drywall installation over a larger area. They made sure the finish matched the uneven surface perfectly.
Tom B.
★★★★★
I had uneven texture after a previous repair that looked like a rough flash patch. The handyman blended the wall carefully and explained each step. He came back for sanding and I’m not seeing the patch anymore.
Maria Gonzalez
★★★★★
They showed up on time, kept the area clean—dust was minimal despite heavy repair work. It took a multi-visit drying process but the wall in my kitchen now has a uniform finish with no callbacks.
Jake
★★★★★
A previous handyman did a patch but left seam lines and flashing paint. This team fixed all that with drywall and paint work, didn’t rush drying, and explained what was wrong. Feels sturdy and the wall looks natural.
Anna L
★★★★★
Repeated customer here—this time needed some drywall repair services for a cracked edge near a window. They assessed it clearly, came back for a touch-up, and kept everything spotless. No callbacks, finally solid finish.
James K
Every drywall issue in Brea starts somewhere, often with a small crack or dent that grows. Recognizing these causes helps understand why a quick Drywall patch near me rarely blends seamlessly.
Door handles swinging open can leave slight dents or shallow holes near handles on bedroom or bathroom walls, creating peeling paint and uneven surfaces that rarely match after simple patching.
Plumbing or electrical work often requires cutting drywall, leaving sharp, uneven openings not easily concealed. These cuts can widen over time as walls settle or cables shift behind the surface.
Removing heavy TV mounts or shelves pulls anchors loose, leaving ragged, oversized holes or crumbled drywall edges that challenge any repair’s neatness, particularly in living areas where damage is obvious.
Settling foundations and temperature shifts strain drywall panels, causing thin cracks along corners or joints with chipped texture. These develop slowly but deepen, making patches stand out visibly.
Homeowners often ask about these drywall issues during the same visit.
HubPro also handles these home repair tasks in Brea when you need more than drywall repair.
When a drywall patch is needed, whether it’s a small hole or a cracked seam, we handle those repairs swiftly to restore smooth walls. While based in Brea, the same reliable drywall touch-ups are routine nearby, ensuring minimal wait times and quality results for local homes.
Our drywall repair work centers in Brea, focusing on visible wall damage, patchwork, and finish details that need quick attention. Given the nature of small repairs, we keep our trips short and plan routes within a reasonable drive, mostly covering nearby parts of Orange County. This approach helps us handle return visits smoothly without stretching the schedule too far beyond the core area.
Looking just outside Brea, the jobs naturally cluster as we move toward adjacent cities in Orange County, making scheduling more practical and efficient. Fullerton and Placentia.
Common questions about Drywall patch near me in Brea when wall damage is visible and previous fixes failed or showed issues.
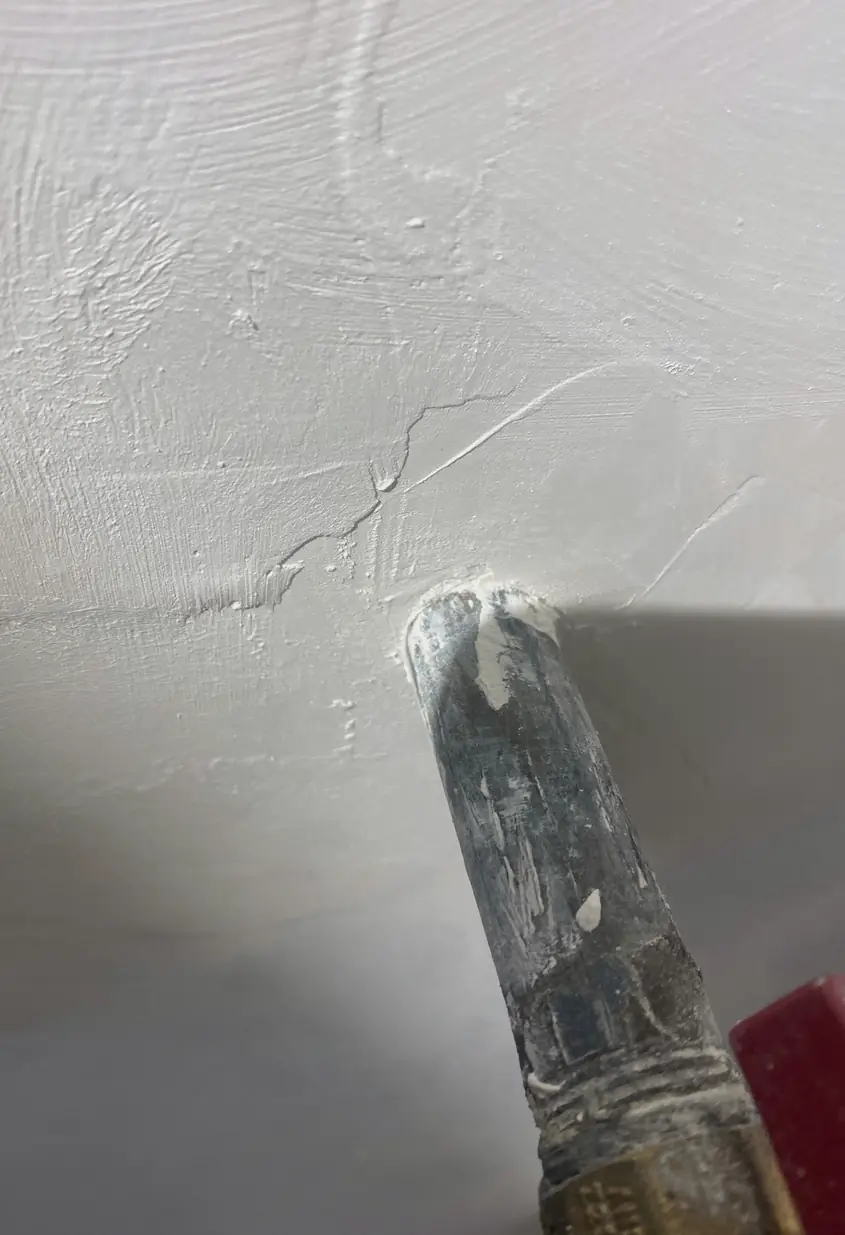
When drywall mud dries, it shrinks, so a patch that looks smooth wet can crack or shrink once dry. This happens from using too thick layers or improper drying. If ignored, cracks widen and show. Proper repair uses thin coats, proper drying time, and sanding to blend. Pro work ensures no callbacks and a stable, clean finish.
Visible edges happen when the patch isn’t feathered out enough or the texture doesn’t match the wall. Side lighting reveals those flaws clearly. If skipped, edges become more obvious over time. Correct repair involves careful sanding, applying matching texture, and blending before paint to make the patch invisible and durable.
DIY patches often miss key steps like proper mud mix, drying, sanding, and texture matching. Many times patches look okay at first but fail after paint or shrivel next day. Professional repair ensures stable, seamless blending and prevents the damage from coming back or worsening.
The cost reflects proper prep, materials, time for drying between coats, sanding, and texture blending to match your wall perfectly. Quick fixes may look okay short term but fail and become more visible, causing repeated work and added costs later. Professionals aim for a clean, long-lasting finish, avoiding callbacks.
If damage is deep, widespread, or the wall is sagging, a basic patch won’t hold or blend well. Ignoring this can cause loose areas or cracks to come back. Proper fix might include removing damaged drywall, installing new panels, then taping, mudding, and texturing for a solid, lasting repair.
Texture differences become obvious in side light because shadows reveal uneven surfaces. A patch might have a slightly different texture or thickness that paint can’t fix. Without proper blending and applying matching texture, the patch stands out. Pros carefully duplicate original texture and blend edges for a clean look.
Patches fail when done too thin, improperly dried, or not fully bonded to the wall behind. Moisture or movement can cause cracks or peeling. Proper repair includes stable mud application, full drying, sanding, and sealing to ensure the patch lasts years without needing redo or showing.
When you search for a Drywall patch near me, precise steps ensure impact damage and rough seams vanish without a trace, avoiding common DIY flaws.
We carefully remove loose debris and clean the impact zone, cutting clean edges to prevent future cracking. Rushed DIY prep leads to unstable patches and visible gaps under shifting light.
A custom-cut patch fits exactly within the damaged space, anchored firmly to studs or backing. Improper patch fit causes bubbling or sagging that DIY often misses, revealing uneven surfaces under bright reflections.
Multiple thin coats of compound create smooth transitions, each dried fully to avoid shrinkage. Skipping dry times or heavy layers can cause cracking and visible depressions that catch shadows oddly.
We sand carefully using several passes to blend edges seamlessly, controlling dust for a clean worksite. Over-sanding or rough edges from quick DIY jobs make seams stand out when light grazes the surface.
Matching texture and applying paint with feathered edges ensures the repair disappears into the wall. Poor blending or rushed painting causes flashing or color mismatches that betray the patch in varying light.