$150+
Small Repair
Quick prep clears loose material before applying compound. A single drying cycle and one finish coat make repairs neat without overworking the surface.
Local Drywall repair Service
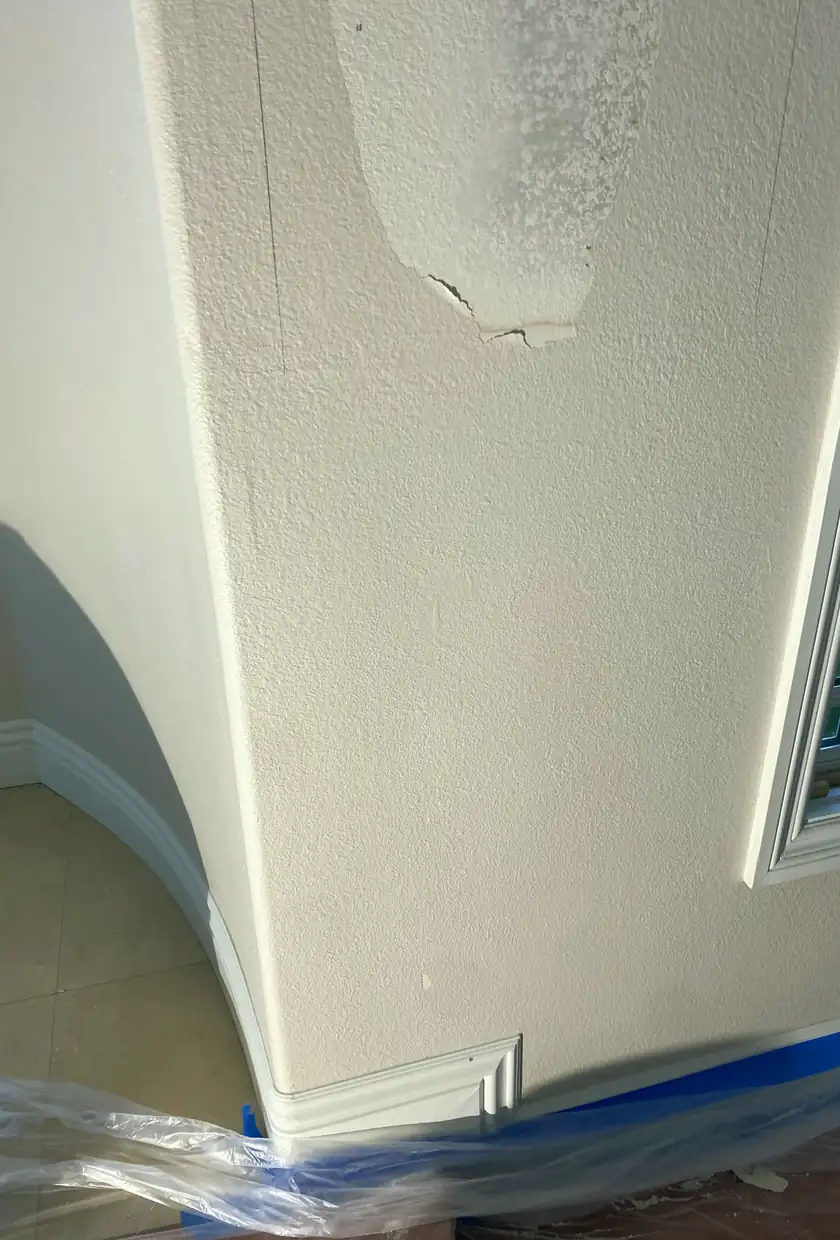
That jagged hole by the doorframe isn’t going to fix itself—the edges are rough, paint peeling, and the surface won’t be smooth with a quick patch. What started as a small ding is now an ugly, uneven mess that’s begging for proper Sheetrock repair in Seal Beach before it gets worse.
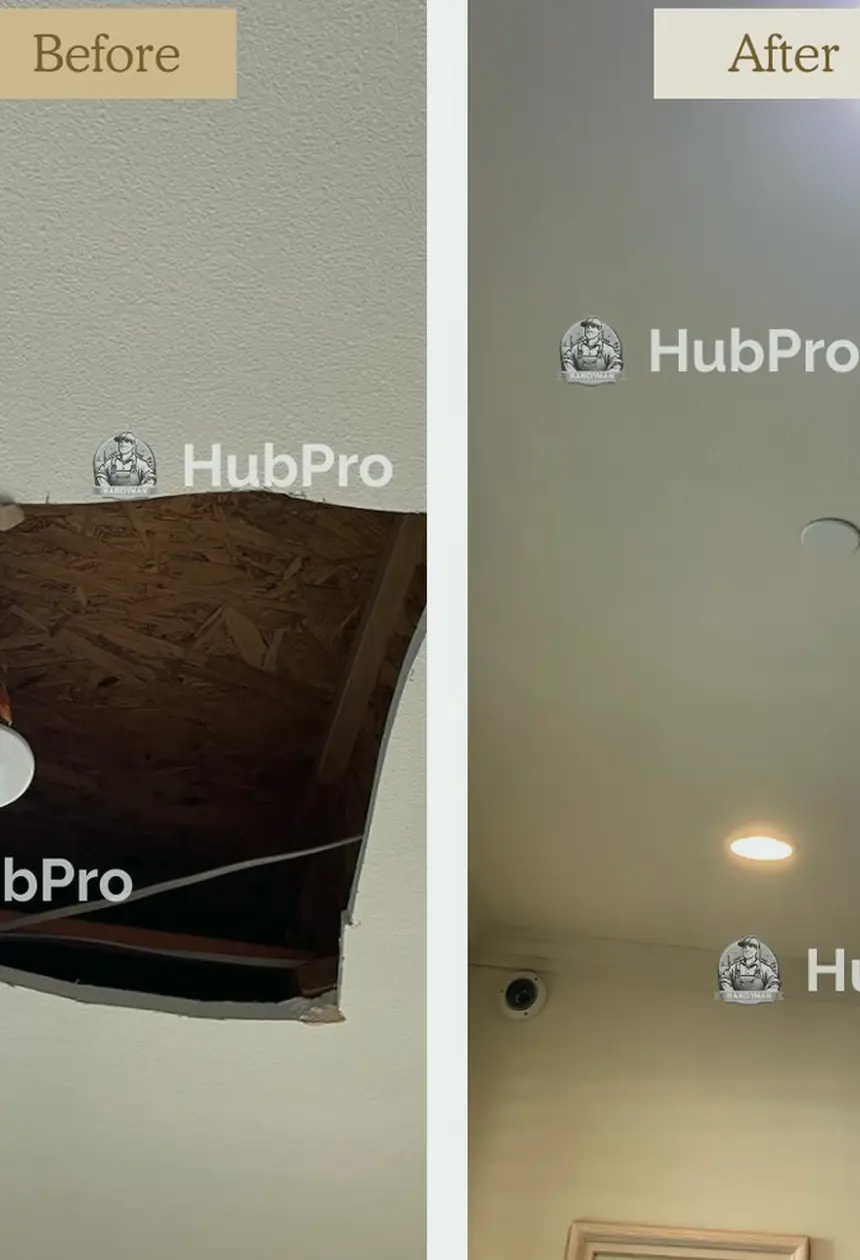
It started with a careless bump from moving furniture—a jagged hole right on the corner of the living room wall, edges crumbling and drywall dust everywhere. That chipped spot caught the afternoon light just wrong, making it impossible to ignore. I knew it needed fixing before it got worse, but the uneven break and crumbly texture felt like a nightmare waiting to happen.
I tried patching it myself, applying joint compound over the ripped sheetrock, but the seams shrank after drying, and the patch never fully feathered out. Light hitting the spot revealed subtle shadows and mismatched paint. No matter how much sanding I did, the repair stuck out as if it was wearing a spotlight. The drywall texture didn’t blend, and my attempts only drew more attention.
Calling in a pro for Sheetrock repair changed everything. The handyman controlled dust while carefully cutting out ruined drywall, layering compound with precision to match the surrounding texture perfectly. Each sanding pass was subtle, feathering edges so the patch dissolved under any angle or light. The paint was matched exactly, erasing shadows or line breaks. The wall stood smooth and seamless, clean work finished right the first time—no callbacks, just a flawless fix.
In Seal Beach, Sheetrock repair involves more than patching holes; visible damage, failed DIY attempts, and texture mismatches call for careful prep and blending to restore walls seamlessly.
$150+
Quick prep clears loose material before applying compound. A single drying cycle and one finish coat make repairs neat without overworking the surface.
$280+
Dealing with rough openings or failed DIY patches requires extra prep and at least two compound layers. Multiple dry times ensure durability and a smooth finish.
$420+
Mismatched textures and visible patches demand extensive blending, three-plus or more compound passes, longer dry cycles, and return visits to achieve an invisible, clean repair.
Top-Rated Drywall repair — 5 Stars on Yelp & Google
Authentic feedback on Sheetrock repair in Seal Beach showcasing lived experience with drywall fixes, texture matching, paint blending, and more.
★★★★★
The door had this jagged hole that I tried patching myself but the drywall patch near me left visible seams. They redid it cleanly and now it’s smooth under every light.
Jesse M
★★★★★
Tried to fix dents with spackle but the drywall installation pro came on time and explained every step. The final surface doesn’t catch my eye anymore.
Anna L
★★★★★
I thought a quick spackle would do, but the texture was all wrong. The drywall and paint job here matched the uneven wall perfectly after a careful sanding process.
Chris D
★★★★★
There was a cracked edge on the wall from careless previous repairs. He kept the area clean while patching and showed up on time. Came back for a second pass to fix the texture and now it looks natural.
Nina S
★★★★★
My old patch sunk the next day because it wasn’t done right. This drywall repair services professional didn’t rush drying and the finish stayed even—no callbacks.
Mark T
★★★★★
Paint mismatch was obvious on one wall section before. After the handyman’s touch, the blend is subtle and no one notices. Explained the whole process, which I appreciated.
Emily R
★★★★★
Soft drywall was a surprise after water damage, and the first patch just peeled off. They replaced the sheetrock properly and treated the surface so now it holds firm with no patch visibility.
David K
★★★★★
Called them because I needed a drywall patch near me for a spot behind the couch. They didn’t rush, controlled the dust well, and the repair blends under light without drawing attention.
Rachel
Our Sheetrock repair process directly tackles visible impact damage, rough patches, and seams to restore your wall’s smooth, flawless finish without the common DIY pitfalls.
We carefully cut out loose or damaged sheetrock around the impact, creating clean edges that prevent crumbling. DIY repairs often miss this step, leading to weak patches that crack or bulge as they dry.
A precisely measured sheetrock patch is anchored firmly to ensure stability. Rushed or ill-fitting patches cause sinking or uneven surfaces visible under normal lighting, something pros prevent with exact cuts and fasteners.
Joint compound is spread in thin, even coats with ample drying between layers to avoid shrinkage and cracking. DIY jobs often trap moisture or rush drying, causing patch edges to pop or shrink and show sharp lines.
Multiple sanding passes blend patch edges seamlessly into the wall. Proper dust containment and feathering prevent uneven surfaces and visible seams that DIY sanding misses, especially noticeable when light hits the wall sideways.
We replicate the original wall texture before painting with matched tones to avoid flashing or shiny spots. Poor blending here often draws the eye, ruining the invisible repair; our care ensures the patch disappears under all light.
Common homeowner concerns after noticing visible wall damage and struggling with Sheetrock repair in Seal Beach.
When a patch is fresh, the joint compound is wet and smooth. As it dries, it shrinks and can pull away from the edges, causing small cracks. This usually happens if the compound wasn’t applied in thin layers or wasn’t allowed enough drying time between coats. Ignoring this leads to visible lines and damage returning. Proper repair involves multiple thin coats, letting each dry fully, then sanding and blending the edges before painting.
A patch often shows after paint because the texture or sanding wasn’t blended well with the surrounding wall. Side lighting can highlight uneven surfaces or edges that differ from the original wall. This happens when the patch isn’t skim-coated smoothly or when the texture doesn’t match. If left, it becomes more visible with time and looks like poor workmanship. Fixing it requires careful sanding, matching texture, and using multiple paint layers to blend seamlessly.
For noticeable damage, DIY patches often fail because amateurs miss crucial steps like proper drying, feathering edges, or matching texture. You’ll see cracks, peeling, or bumps shortly after. Without professional techniques and materials, the problem keeps coming back. A proper repair ensures clean work with stable joint compound application, no callbacks, and results that hold up long term, something difficult for most homeowners to achieve.
The price reflects the time needed for proper prep, multiple drying cycles, sanding, blending texture, and matching paint—especially in Seal Beach where humidity can affect drying times. Rushing or skipping steps leads to repairs failing again, meaning more costs later. A professional approach ensures the patch won’t show lines or uneven spots, delivering a durable fix that avoids repeated work and frustration.
If the damage is deep, affecting the drywall core or framing, or if cracks keep reappearing, patching alone won’t stop it. Visible bubbling or crumbling suggests underlying moisture or structural issues. Ignoring this leads to the patch failing again quickly. Proper repair might mean replacing sections of drywall or addressing moisture first, ensuring a clean and lasting repair instead of a short-term patch.
Texture mismatch happens when the repair compound isn’t applied or finished to replicate the existing wall pattern. Certain lights, like side or natural lighting, cast shadows that reveal the uneven texture. This issue happens because the patch surface is either too smooth or rough compared to the original wall. Ignoring this keeps the damage apparent. Correct repair includes carefully duplicating texture and feathering edges so the patch fades naturally with lighting.
Typical patches fail due to improper prep, using thick layers without proper drying, or poor blending. These lead to cracks, peeling paint, or visible lines as the patch moves or shrinks. Over time, humidity or minor wall movement worsens it. Proper Sheetrock repair in Seal Beach emphasizes clean work, thin coats, proper drying, and stable blending so the patch holds up well and doesn’t keep needing another fix.
Our drywall repair work is centered in Seal Beach, handling small patches, visible wall damage, and finish work with quick visits and occasional follow-ups. We serve nearby spots within about a 20-to-30-minute drive, grouping local jobs efficiently to keep scheduling practical. Travel beyond Seal Beach into Orange County areas may require slight scheduling adjustments but doesn’t impact the care given to each repair.
Beyond Seal Beach, we tend to take on drywall repairs in close Orange County cities to make the most of our trips and keep turnaround times steady. Huntington Beach and Los Alamitos.
When you notice cracks or holes in drywall or sheetrock, we’re ready to step in quickly. Whether it’s a bumped wall or water damage near Seal Beach or just a few blocks over, we handle these repairs efficiently to restore the smooth, finished look your walls deserve without unnecessary wait times.
Homeowners often ask about these drywall issues during the same visit.
HubPro also handles these home repair tasks in Seal Beach when you need more than drywall repair.
In Seal Beach homes, Sheetrock repair often begins with subtle damage that can worsen quickly if untreated. Understanding how these issues start helps recognize when minor flaws escalate into more extensive problems.
Small dents or shallow cracks appear when door handles repeatedly strike walls, leaving chipped paint and rough indentations that seem minor but disrupt the smooth wall surface.
Homeowners or technicians cutting drywall to reach plumbing or electrical wiring often leave uneven edges and visible scars that weaken wall integrity and invite further damage.
When TVs or shelves are hung, anchors can pull out, leaving jagged holes or torn drywall paper that can't be easily concealed and often degrade around the mounting point.
Shifts in the home settle over time, causing narrow cracks along corners or seams that spread gradually, breaking the textured finish and signaling underlying structural strain.
Small holes deepen and expand when ignored, exposing insulation or studs and creating uneven edges that reveal the full extent of internal damage beneath the surface.