Impact from Door Handles
A sudden swing of a door handle can chip paint and dent drywall, leaving uneven patches or surface cracks that seem minor but mark the start of deeper damage.
Local Drywall repair Service
That jagged hole near the hallway corner is a real eyesore—paint peeling around rough, chipped edges and the drywall crumbling inward. It looks like a quick patch might do, but Drywall repair in Cypress isn’t that simple when the surface is uneven and the damage so obvious.
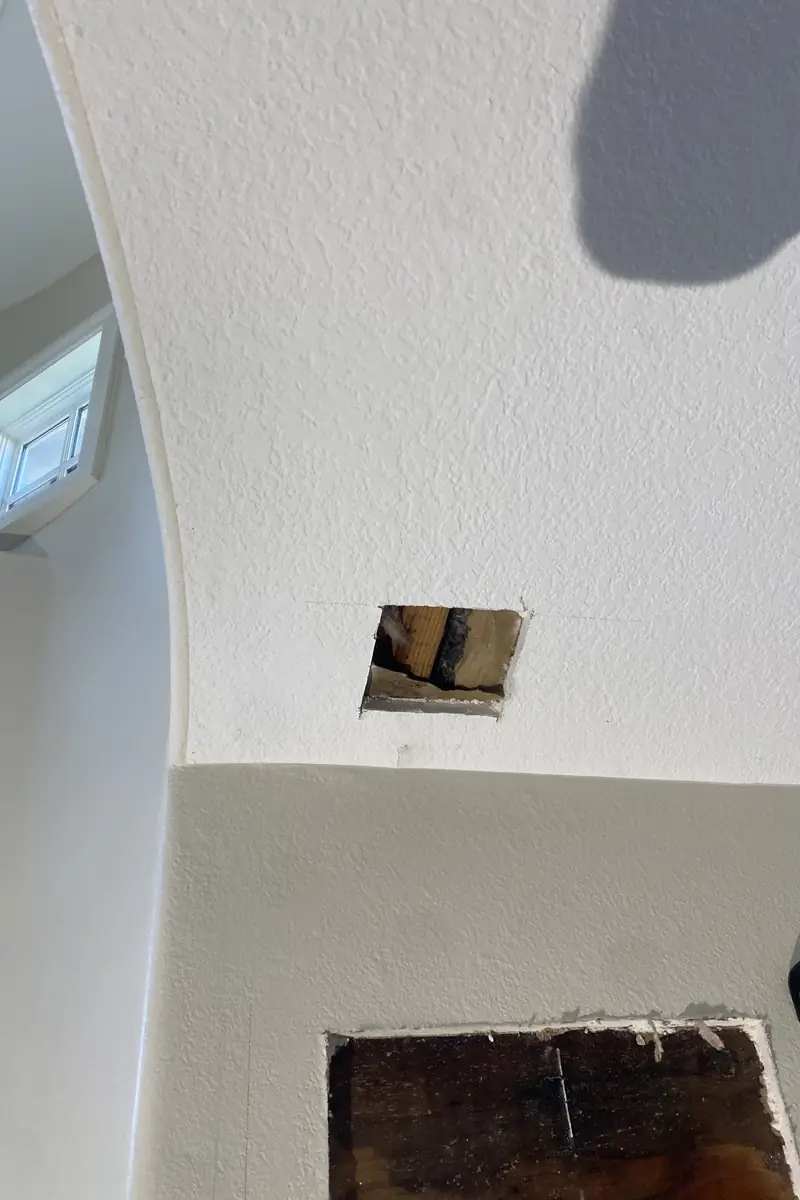
That sudden bump from the moving couch left a jagged hole near the living room corner, with edges crumbling and the drywall paper peeling away. You notice the drywall dust on the floor and the rough texture where the wall’s smooth finish once was—it's frustrating how noticeable that gouge feels every time the light hits it just right.
You tried patching it yourself, spreading joint compound over the hole, but it shrank and cracked as it dried. The seams didn’t blend, and the paint around it looked just a shade different, creating shadows that drew even more attention. It wasn’t just the color—without the right sanding and feathering, the surface felt uneven under your fingertips and looked off when the afternoon sun streamed in.
Calling in a pro for Drywall repair made all the difference. The handyman controlled every detail, sanding carefully between thin compound layers and matching the wall texture flawlessly. They kept the area tidy with dust barriers and finished the job right the first time—no callbacks. Now, from every angle and light, there’s no visible patch, no shadow lines, just a smooth wall that looks original.
FAQs addressing visible drywall damage frustrations in Cypress, explaining causes, risks, and why professional Drywall repair is essential for lasting results.
When drywall mud dries, it shrinks causing cracks that weren't visible while wet. This happens because the patch absorbs moisture unevenly. If ignored, cracks worsen and repainting fails. Proper repair includes multiple thin coats, full sanding, and seamless blending so cracks don't reappear.
Even with paint, side lighting reveals patch edges if the texture wasn't matched precisely or sanding was uneven. It happens because texture and paint reflect light differently. Leaving it means the blemish stays noticeable. Correct fixes involve re-texturing the patch area and feathering paint carefully for uniform appearance.
Incomplete sanding, wrong mud mixtures, or missed feathering often cause patches to crack or stand out under light. The damage seems fixed but comes back quickly. Professionals avoid these by prepping properly, layering mud, and blending texture smoothly, ensuring clean work and no callbacks.
Small visible damage can hide underlying issues like moisture or framing problems causing recurring cracks. Cheap patches may fail, making repairs cost more later. Proper Drywall repair in Cypress includes assessing causes, cleaning damaged material, and quality patchwork for a stable, lasting fix.
If the damaged area is large, the drywall is sagging, or mold is present, just patching won’t hold. The wall may keep deteriorating or bulging. In these cases, replacing damaged drywall sections and addressing underlying causes ensures durability and stops the issue from coming back.
Side lighting exposes any texture inconsistencies since paint reflects differently on patched spots. If the texture isn't blended smoothly, even a perfect paint coat won't hide it. The fix is recreating the original texture before painting, ensuring the whole area looks uniform under all lighting conditions.
Improper prep or rushed patching can leave loose edges or unsealed joints that crack or peel over time. Moisture or structural shifts worsen this. A lasting repair involves thorough cleaning, carefully feathered mud layers, and matching texture and paint to produce stable results without callbacks.
Based in Cypress, we handle Drywall repair around visible wall damage, from patch work to final finishing, with small jobs scheduled for quick trips. Our work stretches into nearby neighborhoods within a 30-minute drive across parts of Orange County, allowing us to cluster jobs efficiently and plan return visits when needed without stretching the schedule thin.
Extending service beyond Cypress, we cover nearby communities where quick drywall fixes are practical within our normal job rounds and travel times. Anaheim and Garden Grove.
When walls show dents or cracks, whether in Cypress or just beyond, we handle those Drywall repairs with care. Small patches or larger fixes get prompt attention, restoring smooth surfaces without hassle. Nearby homeowners count on quick turnaround to keep their walls looking solid and fresh.
Homeowners often ask about these drywall issues during the same visit.
HubPro also handles these home repair tasks in Cypress when you need more than drywall repair.
In Cypress homes, Drywall repair often begins with small incidents that grow unexpectedly worse. From minor dings to bigger openings, this sequence reveals how damage worsens over time.
A sudden swing of a door handle can chip paint and dent drywall, leaving uneven patches or surface cracks that seem minor but mark the start of deeper damage.
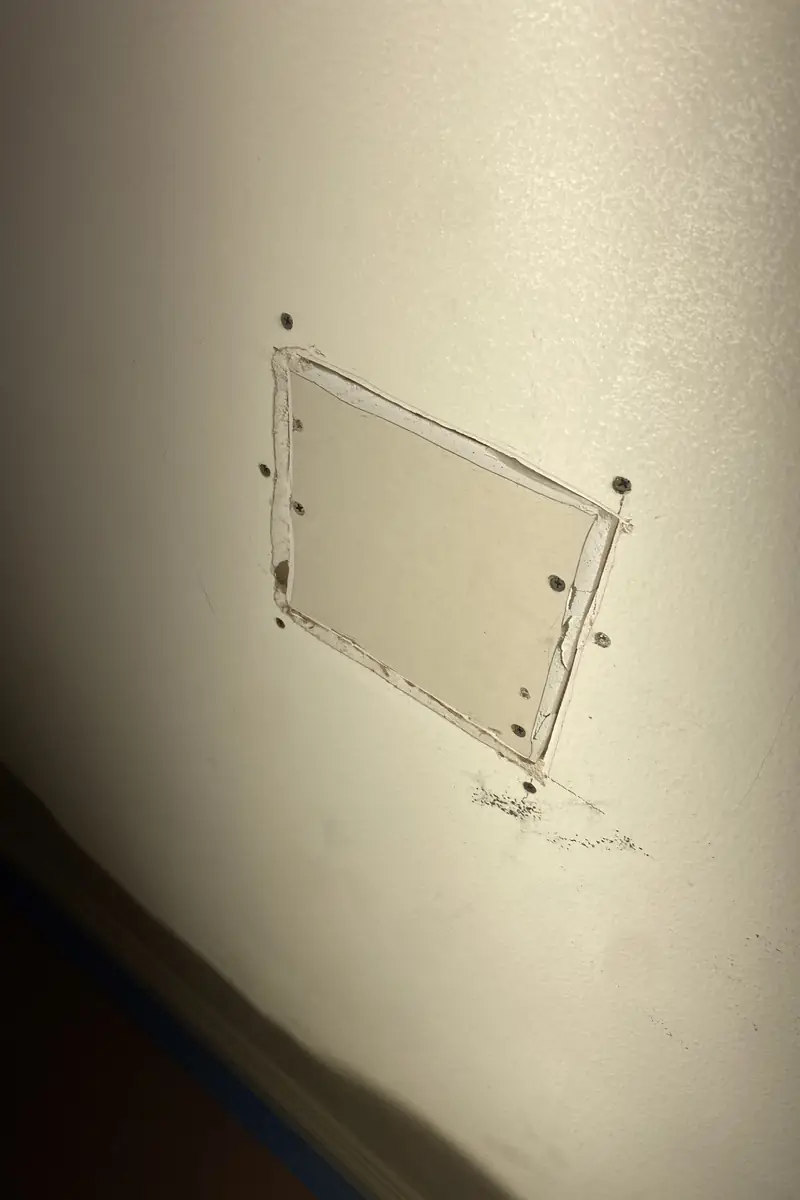
Cutting into drywall to access plumbing or wiring often leaves jagged openings or rough edges that disrupt the surrounding wall’s smooth texture, complicating future fixes.
Pulling out TV brackets or wall anchors can tear away chunks of drywall, exposing rough holes that disrupt the flat surface and reveal how fragile these repairs can become.
Shifting framing and settling cause fine cracks and broken corners in drywall. These imperfections grow over time, showing how small issues become prominent structural flaws.
In Cypress, Drywall repair costs reflect what it actually takes to fix visible patches and mismatched textures. Every step, from prep to blending, ensures lasting, seamless results.
$150+
Fixing a modest patch with minimal prep, one compound application, and quick drying. Focus is on smooth finish to erase the DIY patch’s rough edges.
$280+
Dealing with failed DIY attempts means extra prep, several compound layers, and drying cycles. Multiple visits ensure careful texture matching and strong adhesion.
$420+
Repairs involving rough openings require thorough prep and multiple finish coats. Extensive return visits guarantee flawless blending with existing surfaces for an invisible fix.
Top-Rated Drywall repair — 5 Stars on Yelp & Google
These 8 reviews cover Drywall repair in Cypress, showcasing detailed lived experiences with visible issues and professional fixes.
★★★★★
A big door hole left a jagged edge I tried fixing but made it worse; the sheetrock repair finally made the wall look even under normal light.
Marco
★★★★★
I attempted a DIY drywall patch that sank after drying. They came back for a second pass, sanding carefully, and now the surface is solid and clean.
Anna L
★★★★★
There was a rough paint mismatch over a patch I did myself. They explained the drywall and paint process and controlled dust while blending edges seamlessly.
Chris D
★★★★★
Soft drywall near the corner kept crumbling even after my patch work. Their drywall installation was thorough and didn’t rush drying, no callbacks needed.
Janet F
★★★★★
Had a big dent with uneven texture; they showed up on time, did a multi-visit drying process, and now the finish is consistent without odd bumps.
Neil P
★★★★★
Needed drywall patch near me after a messy previous repair. They cleaned the area and carefully sanded the patch so it doesn’t stand out, even close up.
Lily M
★★★★★
The seams from my quick Drywall repair services were visible in shadows. They controlled dust and camouflaged the lines properly; I didn’t expect the finish to be this flat.
Doug Harmon
★★★★★
Had an old patch that bubbled out; they came back for a second pass and explained what they were doing, cleaning thoroughly. Texture match is subtle now.
Rick
Our Drywall repair process tackles impact damage, rough patches, and visible seams with precision to ensure seamless, invisible restoration that stands up to light and scrutiny.
We carefully cut away loose or cracked drywall around the impact zone, stabilizing the edges to prevent future cracking. DIYers often rush or miss weak spots, resulting in patches that don’t hold steady or reveal shadows under certain light angles.
A custom-cut drywall patch is fastened flush with the wall surface. Proper fitment avoids bulges or gaps, which DIY attempts commonly overlook; this ensures a firm base that won’t shift or create visible unevenness after finishing.
Applying multiple thin coats of joint compound with controlled drying prevents shrinkage and cracking. Rushed drying or thick coats DIYers favor can lead to warping or indentation visible with ambient light.
Multiple sanding passes blend patch edges into adjacent drywall, taking care to feather the compound seamlessly. Skipping this invites raised seams and harsh shadows, plus excessive dust is managed carefully to maintain a clean workspace.
We replicate wall texture and apply paint to perfectly merge with the original surface. Inconsistent texture or paint layering leads to flashing and visible patch outlines, which DIYers often miss, causing immediate visual detection.
A thorough check under various lighting ensures no shadows or seams remain, guaranteeing a stable, invisible patch. This stage prevents callbacks and confirms the repair looks natural from every angle.