Impact from Door Handles
Repeated contact from door handles creates noticeable dents and shallow cracks on walls. These marks may seem minor but disrupt the smooth surface and rarely blend well with simple touch-ups.
Local Drywall repair Service
That jagged hole by the doorframe won’t just disappear, with chipped edges and cracked paint peeling around it. It looks worse than it feels, but attempting a quick Drywall installation in Santa Ana without the right tools means uneven patches and rough seams that stick out like a sore thumb.
The corner of the wall didn’t stand a chance when the couch grazed it during the move—there was a good-sized hole with cracked edges and crumbled paper. The plaster around it was flaking, leaving a rough patch that caught every glance. At first, it seemed like a quick fix, but the damage looked deeper than a simple patch.
Trying to tackle it myself, I mixed joint compound and slapped it on, hoping to hide the gash. But after drying, the patch shrank and cracked along the seams, the edges hard to feather out without leaving obvious ridges. The paint didn’t match either, and under the living room lights, the patched wall threw off shadows that only made the problem more glaring. I stared at the mismatched texture thinking I’d made it worse.
Calling in a pro for Drywall installation changed everything. They controlled the dust meticulously and stripped back to solid drywall to rebuild exactly where needed. Through careful layering of compound and expert sanding, they merged new drywall with the old so no line or bump remained. The finish was flawless—flat from every angle with no visible patch or shadow. Done right the first time, it looked like the damage was never there.
In Santa Ana homes, Drywall installation often begins with small dents or cracks. What starts as minor imperfections can escalate into larger issues if left unattended, revealing the true challenge behind drywall upkeep.
Repeated contact from door handles creates noticeable dents and shallow cracks on walls. These marks may seem minor but disrupt the smooth surface and rarely blend well with simple touch-ups.
To run plumbing or electrical lines, precise but invasive cuts are made into drywall. These clean openings often leave uneven edges and require careful attention to prevent unsightly gaps.
Removing TV brackets or wall anchors pulls chunks from drywall, leaving jagged holes or chipped surfaces. These spots can’t be easily patched over without leaving visible texture differences.
Subtle shifts in house framing cause thin cracks along corners and seams. Over time, these fractures widen, and the brittle texture can flake off, exposing more extensive damage beneath.
Homeowners often ask about these drywall issues during the same visit.
HubPro also handles these home repair tasks in Santa Ana when you need more than drywall repair.
When a wall has cracks or holes from everyday wear or accidents, we handle the drywall repair and installation work nearby, just as we do in Santa Ana. Quick fixes like patching visible damage or smoothing surfaces happen without long waits, so your walls look consistent and solid again.
Our drywall repair work centers in Santa Ana, focusing on small patches, visible damage, and finish work that fit into short visits. We plan trips to nearby spots within Orange County to keep the schedule tight, grouping together close jobs to manage return visits when needed without long delays. This approach helps handle repairs efficiently while keeping travel practical.
Beyond Santa Ana, we cover neighboring areas that can be reached quickly to maintain consistent scheduling and job flow. Tustin and Garden Grove.
FAQs addressing visible drywall damage frustrations and proper repair guidance after Drywall installation in Santa Ana.
When drywall mud dries, it loses moisture and shrinks. If it looked fine wet but formed cracks or gaps next day, it wasn’t applied thickly or layered properly. Ignoring this causes cracks to worsen and show under paint. Proper repair means applying multiple thin layers, sanding between each, then blending edges carefully so patch doesn’t reappear.
A patch often shows through paint when texture or sanding wasn’t matched exactly. Side lighting catches even slight differences in surface smoothness or pattern. If ignored, the patch stands out more with every lighting change. Proper fix requires carefully replicating texture, feather sanding edges, and using compatible primer and paint to blend with the rest of the wall.
DIY attempts often look okay initially but miss key steps like correct layer drying, sanding smooth edges, and texture matching. If skipped, the patch cracks, peels, or shows through quickly. Left unfixed, it keeps coming back and gets more noticeable. A professional repair ensures stable, clean results with no callbacks by using industry techniques and the right materials.
Though the hole looks small, improper patching leads to repeated repairs that add up. Quick fixes miss drying stages, sanding, and texture matching, causing the area to fail again. Investing in a thorough repair means applying mud properly, sanding smooth, blending texture, and using suitable paint – resulting in a durable, clean finish that lasts and avoids future expenses.
Simple patching isn’t enough if the damage is near seams, has deep gaps, or water damage. Such cases require removing weak sections, reinforcing with backing, then applying compound in layers. Ignoring this allows cracks or bulges to return. Proper repair achieves a stable, barely noticeable finish that holds up over time with no sagging or peeling.
Side light highlights any unevenness in patch edges or texture mismatch that’s invisible head-on. This happens when sanding isn’t feathered well or texture is off. If neglected, the flaw grows more visible as light changes during the day. Fixing this means careful sanding of edges and replicating the existing wall texture to create seamless blending after paint.
Quick patches often lack proper compound layering and sanding, causing cracks or peeling as walls shift. If ignored, the damaged area weakens and shows up again over time. A professionally done repair creates a smooth, reinforced surface by using correct drying times and blending techniques, ensuring the repair lasts years without returning or needing callbacks.
Addressing visible drywall damage requires exact Drywall installation steps to restore smooth surfaces and hide imperfections from impact, rough patches, and seams.
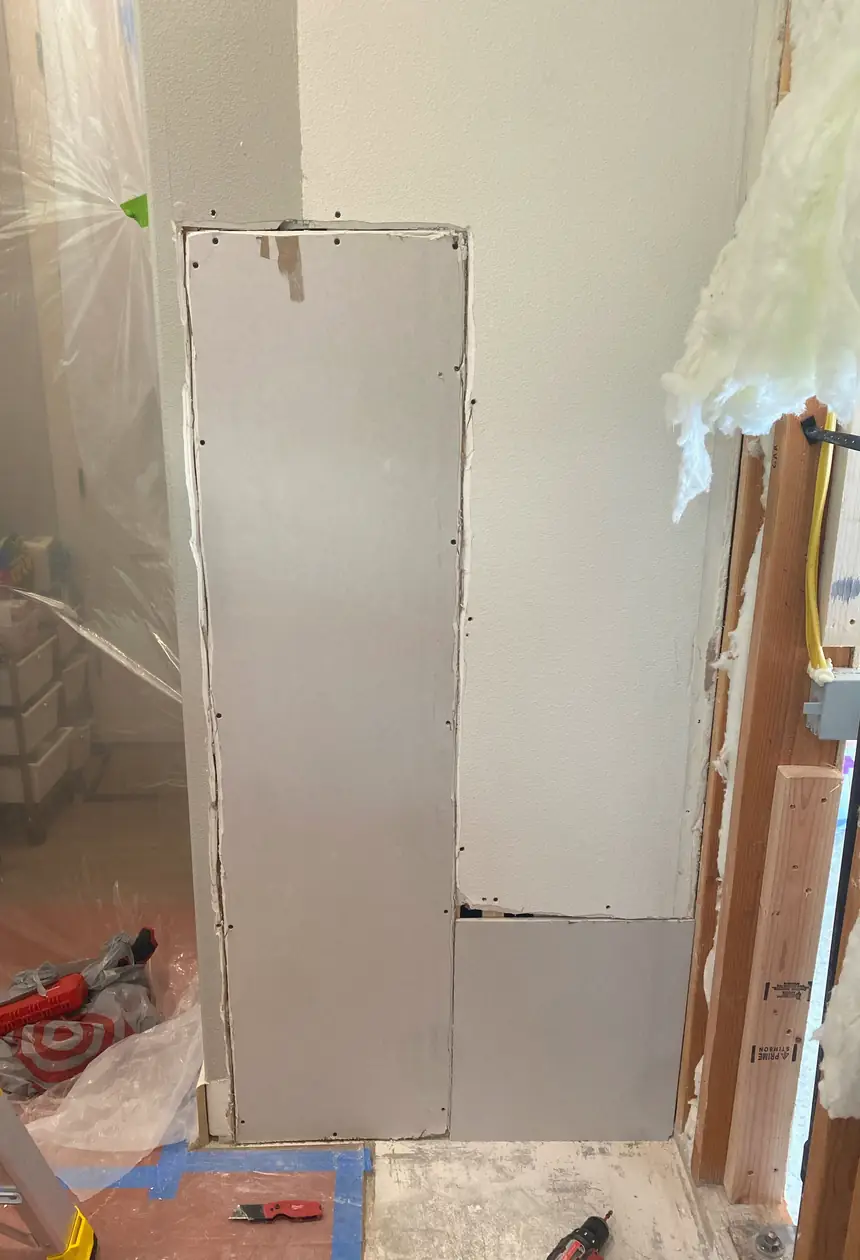
We first cut out loose drywall around the impact, stabilizing edges to prevent future cracking. Rushed repairs miss this, causing unstable patches and visible gaps under shifting light.
A custom cut drywall piece is fitted exactly to the hole, ensuring a flush surface. DIY attempts often result in loose or oversized patches, making seams stick out under shadows.
Multiple thin mud layers are applied, each allowed to dry fully to avoid shrinkage. Skipping proper drying leads to cracking and uneven surfaces that reflect light inconsistently.
Edges are gently sanded with progressive grits to blend patch into wall. Poor blending from hurried sanding creates visible ridges and harsh lines, especially when light grazes the area.
Finally, texture is replicated and paint matched perfectly to integrate the repair. Ignoring texture detail results in obvious repairs with flashing paint that reveals edges under sunlight.
Top-Rated Drywall repair — 5 Stars on Yelp & Google
For reliable Drywall installation in Santa Ana, our handyman service handles everything from small dents to full sheetrock repair with expert care and minimal mess.
★★★★★
The door got a nasty hole after my toddler’s mishap. Tried a quick DIY fix, but the edges cracked after a day. They did full sheetrock repair and it’s now flush with the wall.
Anna L
★★★★★
Found a dent near the corner and my patch job bubbled overnight. Called pros for drywall repair services; they sanded, patched, and blended so well that the spot is barely noticeable.
David R
★★★★★
Paint over my old patch never matched, leaving a blotchy edge visible from 5 feet. They redid the drywall and paint, explaining each step and returning for a second coat to even it out.
Chris D
★★★★★
Had a rough texture patch done last year that drew attention daily. The handyman carefully matched the texture with sanding and scratch techniques. Didn’t rush drying and came back twice.
Maria S
★★★★★
My drywall felt soft and crumbly around a previous repair. This crew replaced the damaged part, controlled dust well, and the finish now looks solid with no soft spots left. No callbacks.
Jake
★★★★★
Searching for 'drywall patch near me' brought them over. They showed up on time, patched the uneven hole near my stairs, kept the place super clean, and the fix doesn’t draw any attention now.
Emily V
★★★★★
Tried fixing a crack myself but paint peeled the next day. Their drywall and paint work included multiple sanding passes and drying breaks, so the patch blends even under direct light.
Kevin M.
★★★★★
We’ve used their Drywall installation twice now—it’s rare to find someone who respects the drying process and keeps dust in check. They explained everything and left the walls looking smooth.
Sophie K.
In Santa Ana, Drywall installation can be tricky when the damage involves visible patches, failed DIY fixes, or mismatched textures. Pricing reflects the real work to restore smooth, invisible walls.
$150+
Simple prep work and a couple of compound layers with drying time ensure a clean patch. This avoids quick fixes that often peel or crack, saving you future headaches.
$280+
Failed DIY attempts or rough openings require extra sanding and at least three compound passes with drying cycles. Multiple visits ensure proper blending for a seamless finish.
$420+
Mismatched texture or large patch areas mean careful feathering and finish work, demanding multiple compound layers and drying sessions. This detailed approach guarantees no visible seams.