When your walls need a fix that Drywall installation in Rancho Santa Margarita can handle right
You step back and notice the chipped edge around that unexpected hole, the drywall’s rough patch catching the light and the paint peeling slightly where the surface unevenness shows. It’s clear this Drywall installation in Rancho Santa Margarita won’t just fix itself—those quick patches never sit right.
Rancho Santa MargaritaDrywall repairDrywall installation
drywall installation in Rancho Santa Margarita that hides every dent and crack
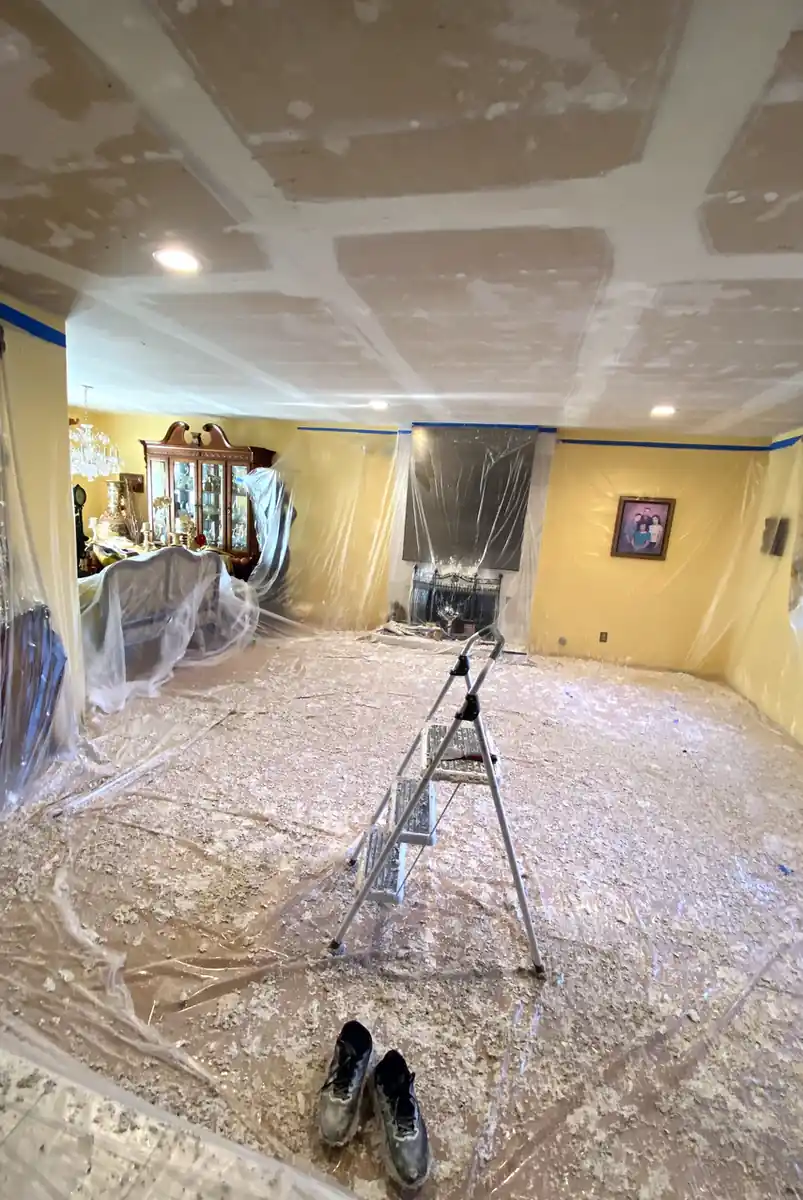
Last week, a heavy chair slipped from the stairs and slammed into my living room wall, leaving a jagged hole near the corner. The drywall edge was broken and rough, exposing the inner layers and creating an immediate eyesore right where natural light hit in the afternoon. It looked worse every time I glanced over—like the damage was growing bigger with every shadow it cast.
I tried patching it myself. I cut a piece of drywall to fit, secured it, then layered a few coats of joint compound. But the seams shrank and cracked after drying, and the texture never matched. Even after sanding, the light hit the area differently, showing obvious patch lines and a subtle shadow where the paint failed to blend. My DIY Drywall installation attempt just made the flaw stand out more, and small imperfections kept surfacing despite my best efforts.
That’s when I called a professional for Drywall installation in Rancho Santa Margarita. The handyman arrived with proper dust control gear, sanded multiple compound layers smoothly, and feathered the edges to blend perfectly with the surrounding wall. The tiny nuances of texture and how light bounces off the surface were expertly matched, leaving no visible patch or shadow lines. The job was clean, done right the first time, and left the wall flat from every angle—no callbacks, no frustration.
Frequently Asked Questions
Common questions homeowners face when visible drywall damage appears during Drywall installation in Rancho Santa Margarita, explaining causes and proper fixes.
Why does the drywall patch look fine when wet but shrinks after drying?
When you first apply joint compound, it looks smooth and seamless, but as it dries, it loses moisture and shrinks, causing visible cracks or indentations. Ignoring this leads to persistent cracks. Proper repair involves applying thin layers, letting each fully dry, then sanding and blending for a stable, clean finish.
Why does my drywall patch still show after painting?
Paint can highlight patch edges due to differences in texture or layering under side lighting. This often happens when the sanding wasn’t smooth or the texture didn’t match the existing wall. If left, the patch becomes more visible over time. Correct repair means carefully matching the texture and blending the patch before priming and painting.
Is trying to fix drywall damage myself worth it compared to hiring a pro?
DIY patches often look okay at first but may crack or show through paint because of uneven sanding or missed texture matching. Without proper technique, the damage keeps coming back and becomes more obvious. Professionals do clean work with no callbacks by ensuring every step — patching, sanding, texturing — is done right.
Why does a small drywall patch sometimes cost more than I expect?
Visible damage may need more than just filling a hole—it can require removing loose material, multiple compound layers, sanding, texture matching, and blending paint. Cutting corners can cause failure or reappearance of damage, leading to repeated repairs. Proper repair protects your wall’s durability and looks clean without ongoing issues.
When is a simple drywall patch not enough for visible wall damage?
If the damage is spreading, deep cracks, or the drywall paper is peeling, just patching won’t hold. Ignoring this causes the damage to grow and the patch to fail. Sometimes, replacing a section or reinforcing the drywall is necessary to make the repair stable and long-lasting.
Why do patched areas look different under side lighting even after repairs?
Side light shows every bump or difference in texture. Even slight uneven sanding or imperfect texture matching makes patches stand out. If unnoticed, this difference becomes a permanent eyesore. Proper repair means matching the exact wall texture and blending carefully to make repairs invisible in all lighting.
How durable is a drywall patch if not fixed properly?
A rushed patch might appear fixed but can crack or peel as drywall moves or settles. Over time, these issues worsen and make the damage more visible. Proper Drywall installation in Rancho Santa Margarita includes using the right materials, layering techniques, and texture blending to ensure your repair holds up for years without callbacks.
Service Areas
Our drywall repair work is centered in Rancho Santa Margarita, where small patches, visible damage fixes, and finish work are done through short visits. We plan jobs nearby to keep trips efficient, often grouping repairs for timely completion. Extending into Orange County, surrounding areas are covered within a practical drive time, with distance sometimes influencing scheduling but not job quality.
Beyond Rancho Santa Margarita, drywall repairs extend into adjacent communities within Orange County, focusing on nearby locations for manageable travel and scheduling. Mission Viejo and Aliso Viejo.
Nearby Cities We Also Serve
When drywall gets dented or cracked, whether in Rancho Santa Margarita or just a short drive away, we handle the patching and installation with the same care. From fixing those small dents to smoothing over visible damage, local jobs are scheduled promptly to get walls looking seamless again.
HubPro also handles these home repair tasks in Rancho Santa Margarita when you need more than drywall repair.
Door repair and adjustment
Interior painting
Faucet and fixture replacement
Furniture assembly
Tv mounting
Baseboard and trim repair
Light fixture installation
Minor electrical repairs
Common Causes
In Rancho Santa Margarita homes, Drywall installation often begins with small knocks that seem harmless but quickly escalate. What starts as minor nicks can soon reveal deeper cracks and damaged edges, showing how issues grow over time.
01
Impact from Door Handles
Repeated contact with door handles can chip paint and create small dents or shallow holes in drywall. Although these marks appear minor at first, they mar the smooth surface and are tough to conceal without careful refinishing.
02
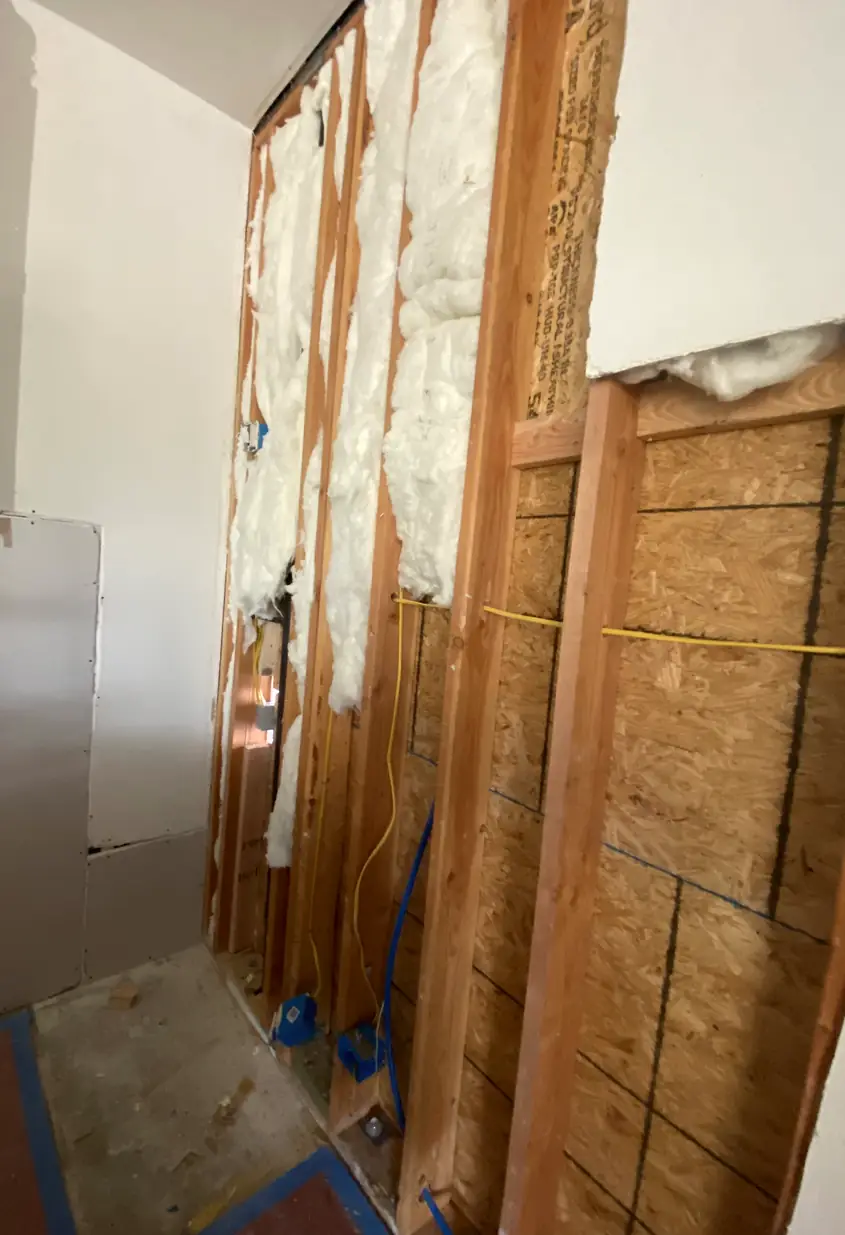
Utility Access Cuts
Plumbing or electrical upgrades sometimes require cutting into drywall, resulting in uneven, rough openings. These access points, if not perfectly squared off, can leave jagged edges that stand out and won’t blend well with the original finish.
03
Damage from Wall Mounts
Heavy objects mounted on walls occasionally pull anchors free, tearing drywall around the fixture. Such mounting damage creates irregular holes and crumbled drywall that resist simple patching and demand more extensive work.
04
Stress-Induced Cracks
Home settling or temperature shifts can cause drywall corners and seams to crack or break. These stress fractures begin as fine lines but may widen, breaking paper surfaces and leaving rough edges that are obvious without thorough refinishing.
Typical Pricing for Drywall repair
In Rancho Santa Margarita, Drywall installation often reveals hidden challenges like mismatched textures or rough openings, which shape our pricing. True repair means blending, prep, and patience to get it flawless.
$150+
Small Repair
Simple patches require careful cleaning and priming, plus a few compound layers. One drying cycle and a single visit ensure a clean, smooth finish that won’t show.
$280+
Medium Repair
Failed DIY jobs with rough openings need extra prep and multiple sanding sessions. Two drying cycles and follow-up visits help create a seamless blend with surrounding drywall.
$420+
Large Repair
Complex fixes with visible texture mismatches demand several compound layers and extended drying. Multiple return visits and detailed finishing guarantee the repair disappears entirely.
What Customers Say
Top-Rated Drywall repair — 5 Stars on Yelp & Google
Our local handyman offers expert Drywall installation in Rancho Santa Margarita with precise texture matching and thorough finishing for seamless results.
YYelp
★★★★★
Had a big hole from our door handle; tried a quick fix that left a rough edge. He showed up on time, sanded it smooth, explained every step, and now it’s barely noticeable.
Anna L
GGoogle
★★★★★
My DIY patch failed fast — the paint didn’t match and the seams cracked. They brought proper drywall repair services, kept dust down, and the wall looks consistent now.
Chris D
YYelp
★★★★★
The texture on our living room wall was all off after a bad patch. He came back for a second pass, didn’t rush drying, and got the finish to feel even across the surface.
Miguel S
GGoogle
★★★★★
There was soft drywall near where water leaked. I thought a simple patch would fix it, but it needed more work. They controlled dust, replaced the damaged parts, and no callbacks needed.
Sophia
YYelp
★★★★★
I needed drywall and paint done because my previous fix was patchy and too bright. They carefully matched everything and the repair now blends under light without standing out.
Jason M
GGoogle
★★★★★
Found a drywall patch near me after my wall got dented badly. The handyman explained what he was doing, kept the work area tidy, and now there’s no sign of damage at all.
Ella R
YYelp
★★★★★
The seams kept flashing after I patched the drywall myself. The handyman showed up on time, sanded more than once, didn’t rush drying, and the surface finally looks right.
Taylor B
GGoogle
★★★★★
Had to hire someone for sheetrock repair after a failed attic project. They took their time, came back for a second pass, and the repaired section doesn’t draw attention anymore.
Rachel Greene
How the Repair Process Works
This Drywall installation process precisely addresses impact damage, rough patches, and visible seams by following each step carefully to achieve a flawless finish, avoiding common DIY pitfalls.
01
Assess and Secure Damaged Area
We start by cutting back to stable drywall and removing loose debris, ensuring a solid base. DIY often skips this, causing patches that shift or fail soon after.
02
Install a Custom Drywall Patch
A pre-cut patch sized to fit perfectly is fastened securely to prevent shifting. Rushed patch installation can create gaps or bulges that show under natural light.
03
Apply Multiple Compound Layers
Using thin, controlled coats of joint compound with proper drying time prevents cracking or shrinking. DIY quick coats often trap moisture, leading to uneven surfaces.
04
Sand and Feather Edges Precisely
Careful sanding blends patch edges smoothly with surrounding wall; controlling dust ensures a clean workspace. Over-sanding or lack of feathering causes visible seams in sunlight.
05
Match Texture and Paint Seamlessly
Final step replicates original wall texture and paints with care, avoiding flashing or color mismatch. Improper blending here makes repairs stand out, ruining the clean look.
Need Help This Week?
Call or text HubPro for drywall repair in Rancho Santa Margarita