Yelp
★★★★★
Had a door hole that my previous fix made worse; their sheetrock repair filled a jagged tear I thought was fine at first. Came back for a second pass and now it’s smooth, no seams showing.
Melissa K
Local Drywall repair Service
That rough patch by the door frame isn’t just paint peeling—it’s a chipped edge with a jagged hole that catches your eye every time you walk by. It looks simple, but a quick Drywall installation in La Habra won’t hide uneven edges or stop the crack from spreading.
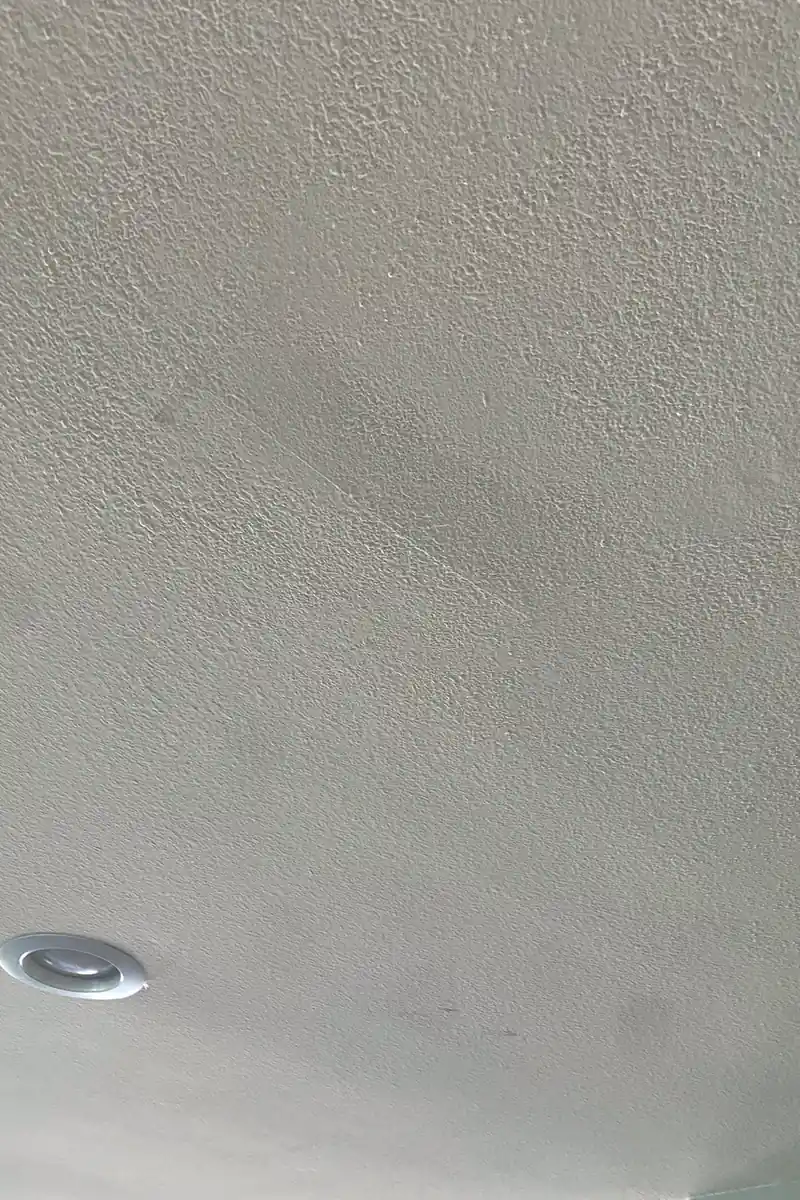
When a heavy chair slipped and tore through the corner of our living room wall, the jagged hole and broken edge instantly grabbed my attention. It wasn’t just a simple crack—this damage caught every glance, especially under the afternoon sunlight streaming in through the window. The rough plaster and shredded drywall paper made the whole room feel ragged, and I knew it couldn’t stay that way.
I tried patching it myself, thinking a quick fix with some joint compound and a few taping strips would do the trick. But after sanding, the seams shrank and settled unevenly. Under the house lights, the repaired area still cast subtle shadows, and the slightly different texture made the patch obvious from several angles. Even touching it, the surface wasn’t smooth, and the paint never quite matched the original wall color. It was frustrating—Drywall installation requires more than just slapping on some compound.
Eventually, I called a seasoned handyman to handle Drywall installation properly. Their careful approach included clean, dust-controlled sanding and expertly feathered layers of compound to blend edges invisibly. The final coat was flawless—no shadows, no raised seams, just a flat surface that looks original from every viewpoint. Clean work, zero callbacks, and done right the first time. Now, the wall feels tight and whole again, exactly as it should.
This Drywall installation process precisely fixes impact damage, rough patches, and visible seams by following controlled, expert steps that ensure a smooth, invisible finish.
First, we cut and remove loose drywall around the damage to create a stable, clean edge. DIY rushes often leave weak patches that shrink or crack under light, making the repair obvious.
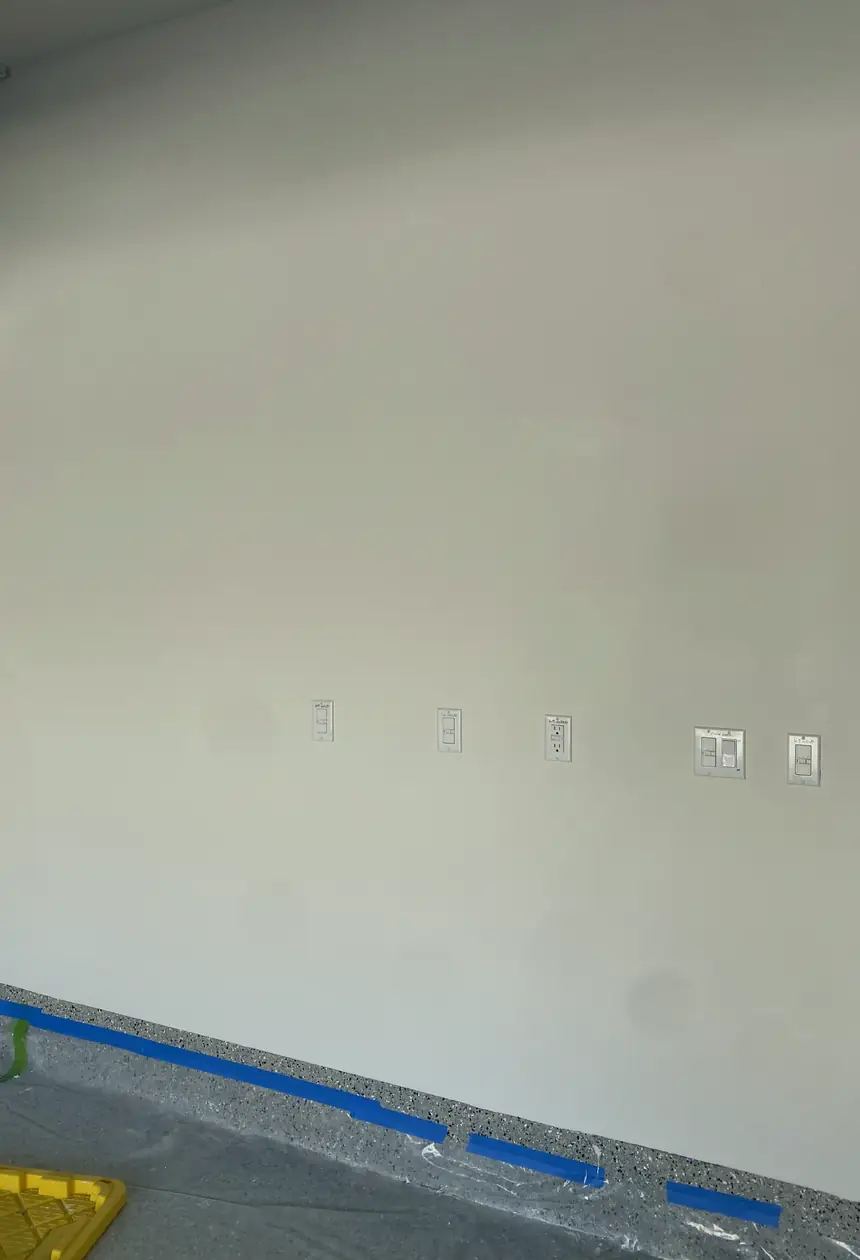
A custom-cut drywall piece is carefully installed to fit the opening precisely. Poorly fitted patches cause gaps or bulges which cast shadows and spoil the wall’s uniform look.
Next, thin coats of joint compound are layered over the patch with controlled drying between each. DIY jobs often rush this, causing shrinkage and uneven surfaces visible under direct light.
Once dry, edges are sanded carefully to blend the patch seamlessly into the wall. Skipping gradual sanding leads to visible lines and edges, and poor dust control can dirty the area.
Finally, the surface texture is replicated and painted to perfectly blend with the surrounding wall. Inaccurate texture or paint flashing makes repairs stand out under varying light angles.
Work areas are cleaned meticulously to avoid dust settling, and the repair is inspected under natural and artificial light. This thorough approach ensures a stable patch with no callbacks.
Common Drywall installation issues in La Habra homes cause visible damage and frustration. Here are answers from a contractor's view to help you understand and fix it right.
When drywall mud dries, it shrinks. You might see a smooth patch when wet, but as it dries it tightens and cracks show up. If ignored, cracks widen and damage worsens. Proper repair means multiple thin coats, sanding between layers, and careful blending to match the wall’s texture. This prevents shrinks and keeps the patch stable over time.
Paint can highlight uneven texture or rough edges at the patch. Light hitting the edges reveals where the repair stops, so the patch doesn’t blend in. This happens because the texture wasn’t matched or the sanding missed spots. The fix is to feather out mud beyond the damaged area and replicate the original texture before painting, ensuring no edge lines show up under light.
DIY repairs often leave behind poor sanding, unmatched texture, or shrinking cracks, especially if you use thick coats. These flaws become more visible over time and can fail again. A pro does clean work with proper layering, texture matching, and blending, which means you avoid repeated fixes and get a stable, long-lasting result.
Surface fixing is just part of the job. Costs reflect time spent on multiple mud layers, drying between coats, sanding, texture replication, and polishing edges. Skipping these steps means visible patches come back or show through paint. Paying for proper Drywall installation in La Habra covers these details to avoid callbacks and ensure a smooth, durable wall.
If damage is deep, or drywall paper is torn or bubbling, patching won’t hold. This leads to patch failure and bigger cracks. With serious damage, sections of drywall must be cut out and replaced. Proper repair involves installing new drywall, mudding seams carefully, sanding smooth, and matching texture for a clean, lasting fix that won’t keep coming back.
Light from the side reveals texture differences more than paint color, exposing rough or flat spots where the patch is. This happens when blending isn’t done well or texture tools mismatch the original. The solution is reapplying compound with the right tools and techniques, then sanding gently to blend seamlessly, so the repair disappears even in bright side lighting.
A quick patch without proper prep and layering tends to crack or peel over time, especially if built-up layers shrink unevenly. Proper drying time between coats and texture blending prevent this. Lasting repairs require patience and skill to layer mud correctly and feather everything out so the patch bonds strong and blends clean for years without needing redo.
Top-Rated Drywall repair — 5 Stars on Yelp & Google
Local handyman experts providing drywall repair services with clean, detailed work and reliable timing in La Habra, CA. Trusted for Drywall installation in La Habra.
★★★★★
Had a door hole that my previous fix made worse; their sheetrock repair filled a jagged tear I thought was fine at first. Came back for a second pass and now it’s smooth, no seams showing.
Melissa K
★★★★★
Tried a drywall patch near me for a cracked edge but the texture was off. They sanded and matched the finish so well it doesn’t draw attention anymore.
Chris D
★★★★★
The drywall repair services fixed a soft area I didn’t catch when I patched it myself. They controlled dust in the room and explained why the damage happened before doing a solid job.
Jade M
★★★★★
Paint mismatch made the drywall and paint blend look awful after my attempt, but they carefully feathered the edges and waited the right time not to rush drying. Looks way better now.
Samuel H
★★★★★
They found more damage beneath the surface than was visible so the Drywall installation involved more than a patch. I appreciated them showing up on time and coming back for a second pass.
Anna L
★★★★★
Soft drywall patch ended up sinking next day, but they rechecked and fixed the texture inconsistency perfectly without rushing the drying process.
Lorenzo
★★★★★
Dust was controlled well through the drywall repair, kept my living space clean. I liked the transparency about what steps were needed.
Rebecca P
★★★★★
Called them again for another spot; no callbacks needed after their multi-visit sanding and finish process. The patch doesn’t stand out under any lighting now.
Marcus T
In La Habra, Drywall installation often uncovers issues like visible patches, failed DIY attempts, or mismatched textures that directly impact repair costs. Each fix reflects true effort for a seamless finish.
$150+
Fixing minor visible patches requires careful prep and texture matching. One drying cycle and a single visit ensure clean results that won’t show from across the room.
$280+
Failed DIY spots need extra compound layers and sanding. Multiple drying stages and at least two visits allow us to blend edges properly for a smooth, natural look.
$420+
Working around rough openings with mismatched texture demands thorough prep, several compound passes, plus multiple drying cycles. This meticulous process guarantees a flawless, invisible finish.
Drywall installation in La Habra often begins with subtle damage that homeowners overlook. What starts as a minor blemish can quickly escalate into more serious wall issues without careful attention.
Repeated knocks from door handles create small dents or shallow holes near doorknobs. These blemishes might seem trivial at first but compromise the smoothness of drywall surfaces, making patches obvious.
Plumbing or electrical work often demands precise cuts into drywall, leaving uneven edges and visible gaps. Such interventions rarely blend seamlessly, leaving marks that hint at hidden repairs beneath the paint.
Heavy TV brackets or wall anchors pulled loose tear chunks of drywall away from the underlying studs. These ragged holes disrupt texture and can cause paint to chip, revealing the extent of internal wall damage.
Natural settling causes fine cracks along drywall corners and joints to emerge. These fractures slowly widen over time, breaking the continuous finish and making even small imperfections more noticeable.
Homeowners often ask about these drywall issues during the same visit.
HubPro also handles these home repair tasks in La Habra when you need more than drywall repair.
When a wall in La Habra shows cracks or dents, we handle the drywall repair and installation just a short drive away. Whether it’s a small patch or a full panel replacement, neighborhoods nearby rely on prompt fixes that restore smooth, clean walls without the wait you’d expect from distant contractors.
Our drywall repair work is centered in La Habra, handling smaller patch and finish tasks that fit into short visits. For visible wall damage, we plan routes carefully to cluster jobs nearby within Orange County. This way, we keep return trips efficient and ensure practical scheduling without stretching travel times too far.
Beyond La Habra, we regularly cover neighboring communities where quick drywall repairs and touch-ups are common, fitting well within manageable driving distances. Fullerton and Brea.